Paper Mache Hearts…. DIY

1- Cut out heart shape of card board, the size you like.
2- Tape a ribbon on the top of the heart to hang it later.
3- Scrunch up newspapers, fill the heart or give it 3D form, and mask it with scotch tape.

20150223_115051


Paper mache layering:

1- Mix the white glue or (PVA, School white glue) with little bit water in a bowl to be liquid.
2- Cut the newspaper into stripes.

20150223_115110
3- Dip stripes into the glue bowl until it coat on both sides.
4- Cover the heart with first layer of newspapers stripes.
5- Repeat layiring at least 4 layers to get strong after drying.

20150223_120645
6- It might takes long time to dry depends on the weather sorround it.
7- Paint it with white acrylic or spray.

IMG_0847
8- start decorating……enjoy it 🙂

20150227_224315

Papers mache harlequin….DIY

11079638_1014860071865382_260424021845064931_n

PREPARING THE DOUGH:

1- Soak few sheets trash papers; (Newspapers, Eggs box,kitchen paper towel…)in boiling water for an hour.
OR Soak it for whole night in water in room temprature.

2- Grind them in a kitchen mixer until getting smooth pulp, mix as much as you can, you can add water while grinding.

3- Squeeze out the water:
Strain them on a strainer plenty time or squeeze it out by putting the mixture in a piece of cotton fabric and squeeze it.
Now you have got a nice pulp.

4- After squeezing all water out, add pva glue or wood glue or school white glue.

pizap.com14515680983431

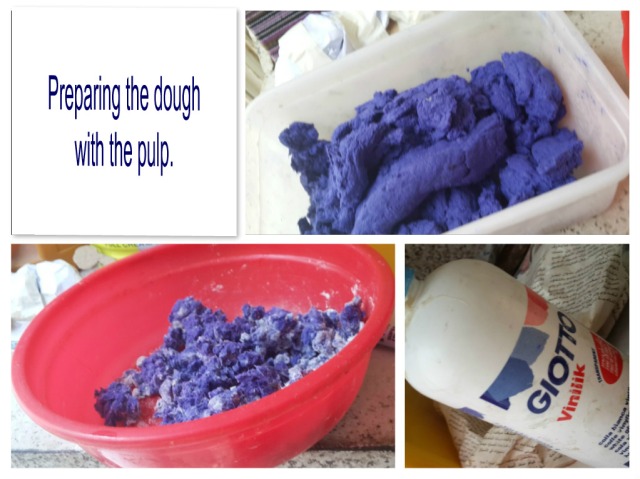
5- Keep kneading the pulp with glue till it becomes a dough/pulp.
You can add a bit of flour “Maida” & spoon of salt; it helps to get smooth pulp, and easy to shape it.

6- Now you can make so much creations by papers mache pulp.
Once it dries you can paint it with acrylic colours.

Tips:
1- Let the paper mache dough completely dry then keep it in dry place, then take the mount you nedd for the project, wet it with little water, squeeze it, add white glue…..enjoy your paper mache projects 🙂
2- Put your dough in a container to prevent it from drying, put the container in fridge….to use it later in your projects 🙂
*************************************************
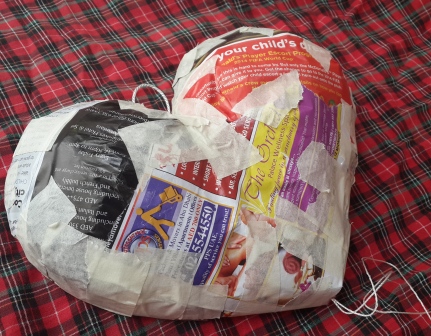
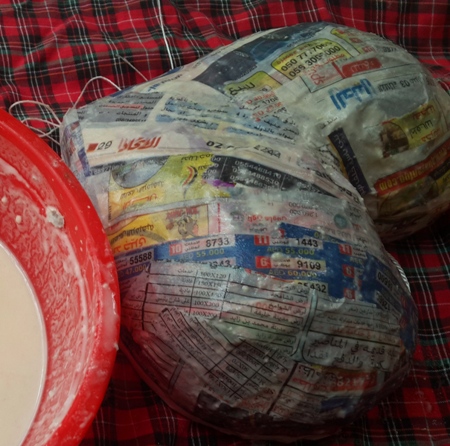
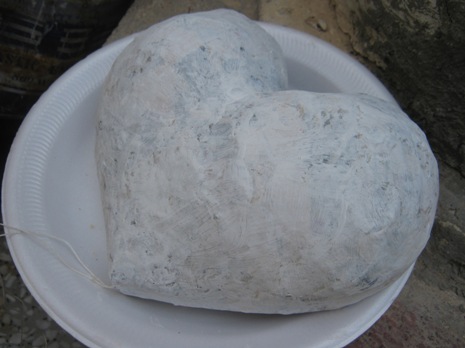
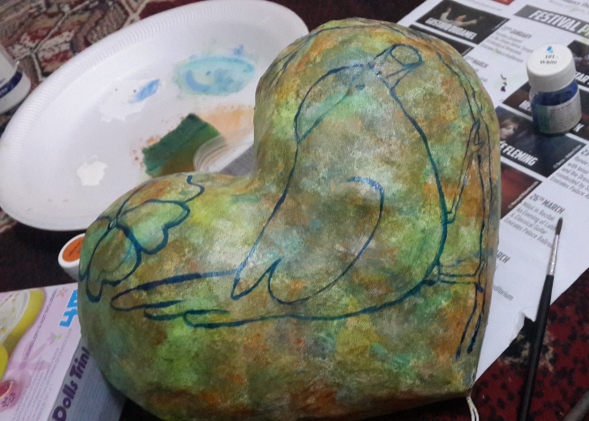
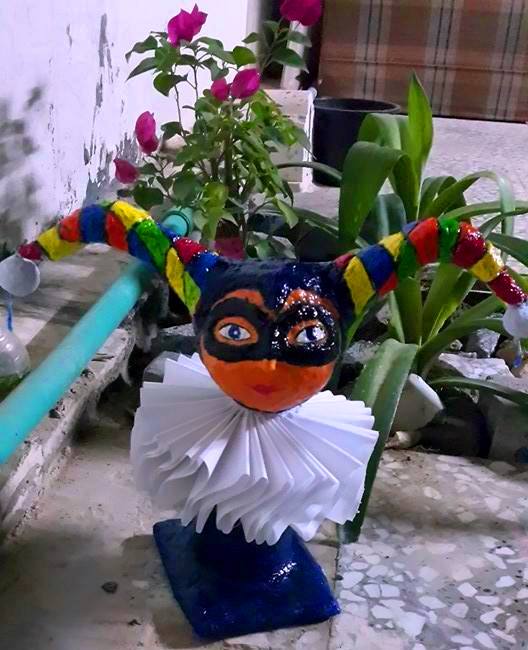
My first piece is #paper_mach harlequin
First:

1- I made the shape, by using old bottles, ballon, scotch tape.

pizap.com14515677215781

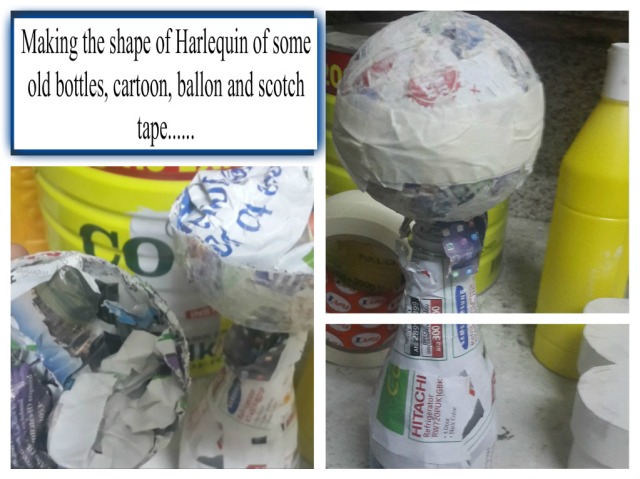
2- Add the paper mache pulp, make the details.

11077898_1005428549475201_1468941259_n

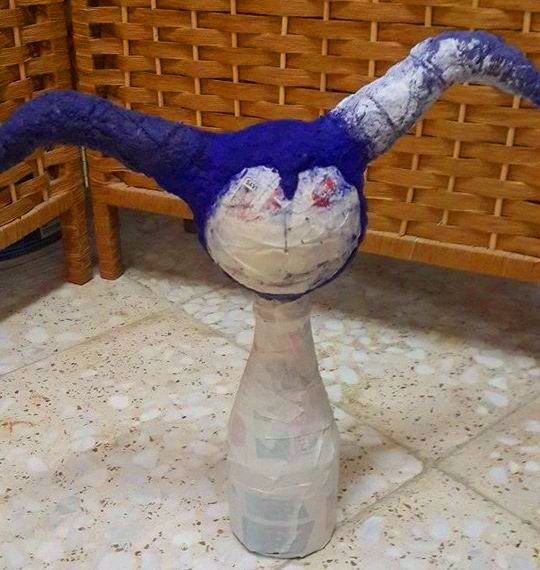
The purple pulp is made from egg boxes, mixed with PVA.

2

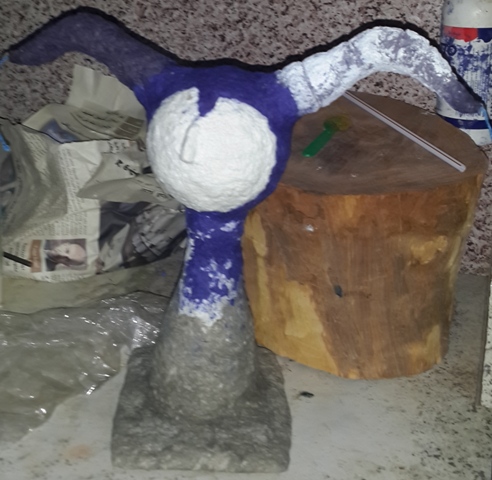
The gray pulp made from newspapers mixed with PVA.

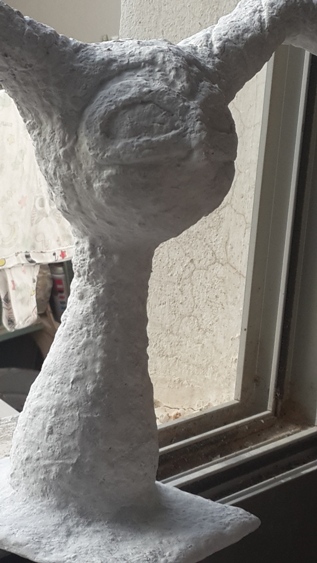
3- Let the pulp dry completely.
4- Paint it with white acrylic, Gesso, or white spray.

3

5- Color the object.
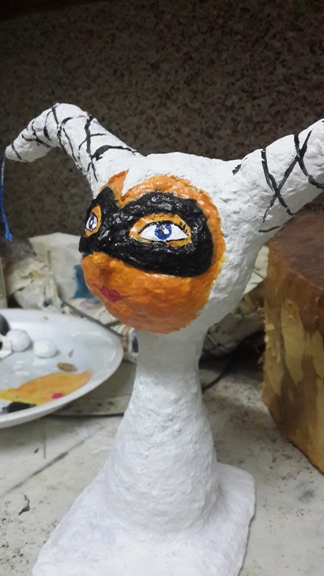
4         5

DONE!

Happy craftting !!

Decoupage on eggshell

Hi folks!

Today I’d like to share my new pieces done with “decoupage on eggshell”.
I liked the effect of mosaic and I repeated it again and again on paper mache boxes…:)
IMG_20150905_150528       IMG_20150928_161023
Make sure you have the materials:
Decoupage papers “Napkins”
Eggshells
White glue
Objects: Paper mache boxes

11        1

STEPS:
Collecting 3-4 eggs; (drain and clean them nicely) :).

I have selected paper mache boxes for this project.
I applied that technique only on the lid of the box/ cover.

2
Gently crush the eggshells into small-medium pieces
Spread white glue on small portion of the surface and place the eggshells on it firmly with finger tips.
Repeat the progress until cover the whole surface with eggshells.
Allow the glow to dry.
When it dry completely, give it a coat of white paint.

3

Now it is Decouapge time!!
I have selected nice napkin with flowers,,cut the designs you want 🙂
REMEMBER: Decoupage papers normally come in three layers, we need to get rid of two layers and use the layer with prints on it, and cut the shapes by scissors or better with your hand.

Apply a coat of glue again and stick the napkin to the object.

4        5
Press gently using the brush to push the napkins into the small gaps between the shells.
The mosaic effect will appear.

6
Happy crafting!